My First PCB
Published on 2015-01-14 in Pico-Kubik quadruped robot.
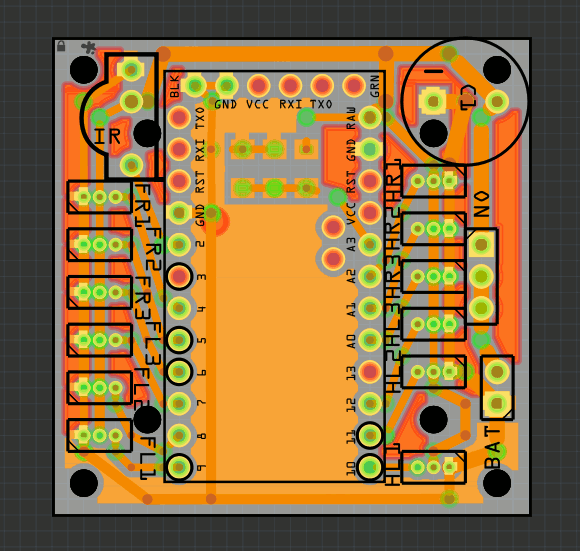
The whole robot building thing is supposed to be a learning experience. So after fumbling with the wires and prototype boards for a while, I decided it’s time to try and design an printed circuit board for the robot. The advantage, apart from much better handling the tiny 1.27mm spacing, would be that it could also double as a base for the robot.
After trying my skills with a number of available PCB-designing software (Egale and KiCad, among others), I finally decided to use… Fritzing. Maybe it’s not as advanced as the others, but at least has user interface from this millennium, and can generate Gerber files without too much hassle. It’s also the only one where I found how to place elements on the board and connect them first, and then create the schematic – which is much better if I have a choice for using multiple pins for the same thing, and can choose the closest one. It also already came with an Arduino Pro Mini footprint.
The board is pretty simple, it’s just has a place to put your Arduino in, and sockets for the servos. There is also room for a big capacitor, a power switch, a battery voltage monitoring circuit, and an optional IR receiver. It can then use just the Arduino for some simple behaviors, or have something smarter (like the VoCore) connected through the UART or I²C.

 deshipu.art